Hello everyone,
Been checking out things here for awhile.Great place.I'm about to start a express build.This will be my 2nd amp build.I built a plexi 50 awhile ago that I'm happy with.I ordered my trannies from Tonesluts yesterday,so I guess I'm commited.
I haven't decided if I want to cheat a bit and get a chassis from Nik and just swap out parts.I have my own Buisness doing custom cab's, furniture and trim work ect.Things are kinda slow right now in the housing market.
This would give me time to do a ground up build,however I could get real busy in a hurry and not be able to work on it at all.That's how it goes in my line of work.
well,whatever I decide I'm looking forward to the Journey.Wish me luck.
I'm sure I'll have a million questions once I get everything rounded up.
Cheers
Steve
About to start my express
Moderators: pompeiisneaks, Colossal
Re: About to start my express
Good luck with the build Steve,
if you spend some time getting used to the search function on the forum, most if not all of your questions will probably already have been answered.
I have probably another week or two until my build is fully assembled, the guys on here really know their stuff, and are very willing to share information... its a nice forum to be part of.
Re: About to start my express
Well....I've slowly got parts showing up.Recieved another box from Mouser today.Some of my parts are backordered.
As soon as Allyn's Chassis and Mooses trannies are delivered, I'll start
some assembly with pics.The electro switch for selecting impediance,I'm using the one in Ron's BOM.How exactly is this wired as far as the jumpers are concerned.For example,If the Red 4 ohm tap is on pin #1.Then wire jumper from pin #1 to pin #7 and Pin #2 yellow 8 ohm and jumper to pin #8 and so forth ???
Well any help is apprecited.I've got a pretty good hand on most of this project...I think....but I've never used a switch like this before.
Thanks Steve
-
Ron Worley

- Posts: 908
- Joined: Mon Dec 24, 2007 8:21 pm
- Location: Keller, TX
Re: About to start my express
Steve-
Download the Build guide... it explains (hopefully) most of your questions.
Here's a shot of the impedance switch...
Download the Build guide... it explains (hopefully) most of your questions.
Here's a shot of the impedance switch...
You do not have the required permissions to view the files attached to this post.
Re: About to start my express
Hey Ron,
I downloaded your build guide.Great job by the way.
Concerning the electroswitch though,I'm a little confused.
The back of the switch labels the 12 positions.The 4 ohm tap goes to pin #1.Then the jumper connects to pin #1 and gets soldered to pin #7.Correct...the opposing pin.Just trying to be clear so I do it right.The build guide says to solder to adjacent pin { next to }.
Again, great job and much thanks for your BOM and build guide.I'd be scratching my head for along time with out those.
Steve
-
Ron Worley
- Posts: 908
- Joined: Mon Dec 24, 2007 8:21 pm
- Location: Keller, TX
Re: About to start my express
Steve, Sorry I was not clear- it says "adjacent GANG", not "adjacent lug"
The switch has 3 gangs of 4 lugs for 12 lugs total. Each gang of 4 lugs has one input lug that is switched to the other 3 based on switch position.
The jumpers are run from the gang at the top of the switch to another gang- lug 1 to lug 1, etc. I suggest that you use your DMM to help you understand what lugs connect to each other. I took about 20 mins making sure I had the switch orientation and lugs figured out...

Ron
The switch has 3 gangs of 4 lugs for 12 lugs total. Each gang of 4 lugs has one input lug that is switched to the other 3 based on switch position.
The jumpers are run from the gang at the top of the switch to another gang- lug 1 to lug 1, etc. I suggest that you use your DMM to help you understand what lugs connect to each other. I took about 20 mins making sure I had the switch orientation and lugs figured out...
Ron
Re: About to start my express
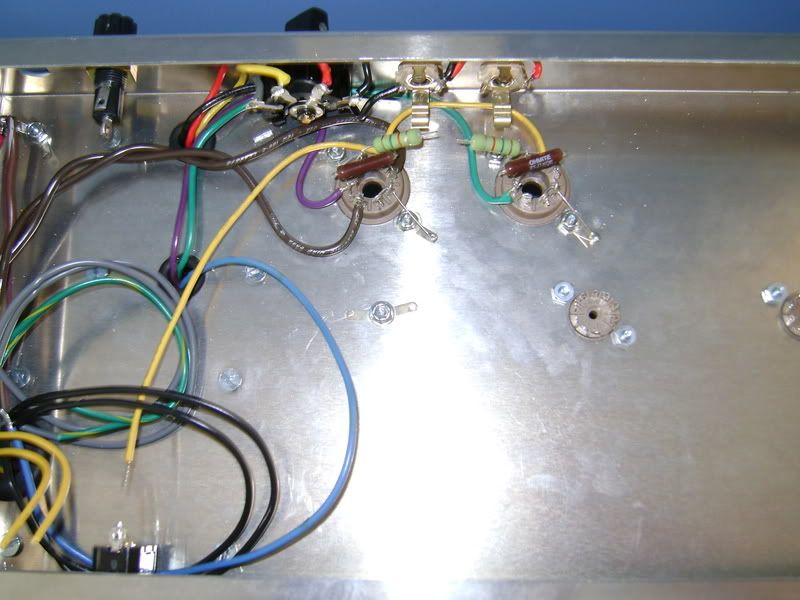
Well,I've made a little progress.I'm in parts limbo.Still waiting on wire,boards and a couple other items that Mouser was out of.Here's a couple pics so far
[/img]http://i138.photobucket.com/albums/q279 ... C00262.jpg[img:800:600]http://i138.photobucket.com/albums/q279 ... C00263.jpg[/img]
[/img]http://i138.photobucket.com/albums/q279 ... C00262.jpg[img:800:600]http://i138.photobucket.com/albums/q279 ... C00263.jpg[/img]
Re: About to start my express
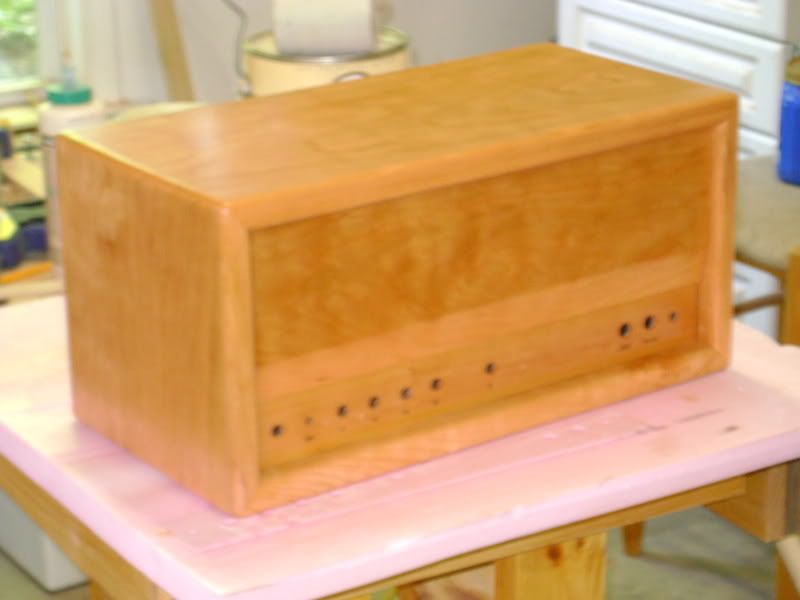
I'm still waiting on a few parts but I took the time to build my cab while I had the time.Steve
[/img]http://i138.photobucket.com/albums/q279 ... C00283.jpg
[/img]http://i138.photobucket.com/albums/q279 ... C00283.jpg
You do not have the required permissions to view the files attached to this post.
Re: About to start my express
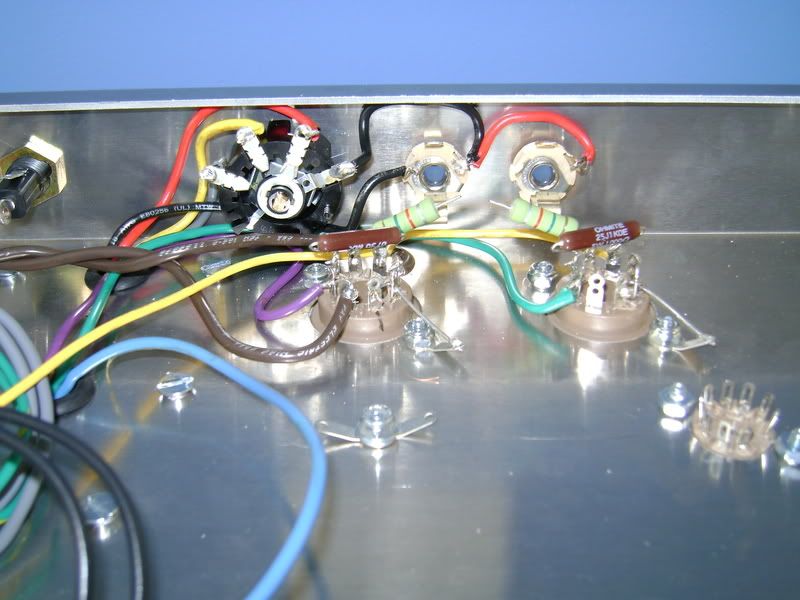
Chassis so far.....Steve
You do not have the required permissions to view the files attached to this post.
-
skyboltone

- Posts: 2287
- Joined: Wed May 10, 2006 7:02 pm
- Location: Sparks, NV, where nowhere looks like home.
Re: About to start my express
You guys with actual wood working skills make me tired. Great job sir! BTW, what size roundover did you use? Did you make the front bevel with a table saw? I have the plan that is available here but it's not clear how the front panel is made fast to the rest of the cabinet. I had imagined that a set of cleats on the sides would do the job but is it good practice to maybe assemble the whole mayann in one operation with biscuits? How in the devil do you make the front panel precisely the proper width so as to avoid a gap? Elementary questions I'm sure but nevertheless something I'd like to learn so that I don't end up covering expensive hardwood with tweed!stevek66 wrote:I'm still waiting on a few parts but I took the time to build my cab while I had the time.Steve
[img:800:600]http://i138.photobucket.com/albums/q279 ... C00283.jpg[/img]
The Last of the World's Great Human Beings
Seek immediate medical attention if you suddenly go either deaf or blind.
If you put the Federal Government in charge of the Sahara Desert, in five years time there would be a shortage of sand.
Seek immediate medical attention if you suddenly go either deaf or blind.
If you put the Federal Government in charge of the Sahara Desert, in five years time there would be a shortage of sand.
-
geetarpicker

- Posts: 916
- Joined: Sat Mar 12, 2005 8:08 pm
- Location: Nashville, TN
- Contact:
Re: About to start my express
On my '89 Express the front panel has about a 50% thickness tongue on 3 sides that fits into routes in the top and the 2 sides. I think the tongue stops at the bevel, and as far as I can tell it just floats on that last little area on each side. Therefore there are no mounting cleats or strips inside the cab, which does help with transformer clearance.
Re: About to start my express
Hey thanks,skyboltone wrote:You guys with actual wood working skills make me tired. Great job sir! BTW, what size roundover did you use? Did you make the front bevel with a table saw? I have the plan that is available here but it's not clear how the front panel is made fast to the rest of the cabinet. I had imagined that a set of cleats on the sides would do the job but is it good practice to maybe assemble the whole mayann in one operation with biscuits? How in the devil do you make the front panel precisely the proper width so as to avoid a gap? Elementary questions I'm sure but nevertheless something I'd like to learn so that I don't end up covering expensive hardwood with tweed!stevek66 wrote:I'm still waiting on a few parts but I took the time to build my cab while I had the time.Steve
[img:800:600]http://i138.photobucket.com/albums/q279 ... C00283.jpg[/img]
The front panel is just dadoed in like Glen described.The Cabinet is the easiest part of the overall build for me.I build cabinets and furniture for a living.Cleats won't allow enough clearance for the PT.
Thanks Steve