Tweed Cabinet Build – Mack Skyraider SR-30 Quad
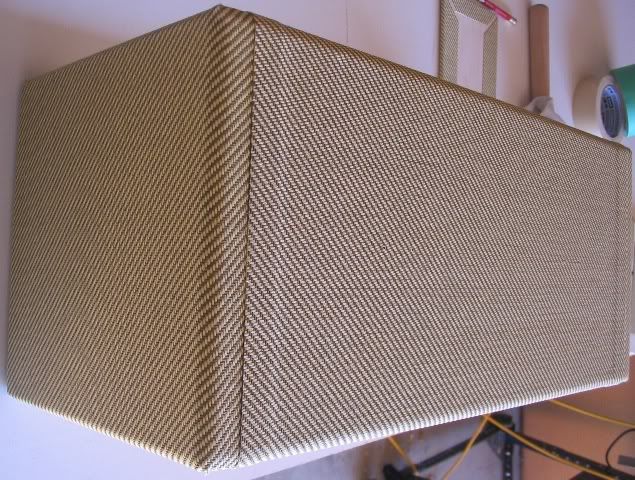
The Cabinet
With this project, I hoped to learn something and also contribute to others who might want to try building or covering a cabinet in tweed, but like me couldn’t find a whole lot of information on the subject. This was my first attempt at building an amp cabinet and covering one.
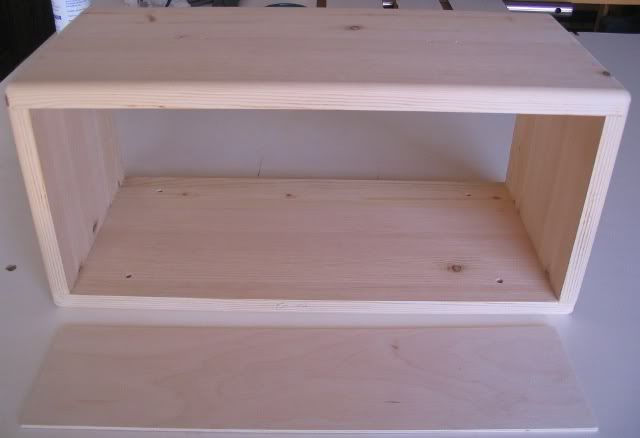
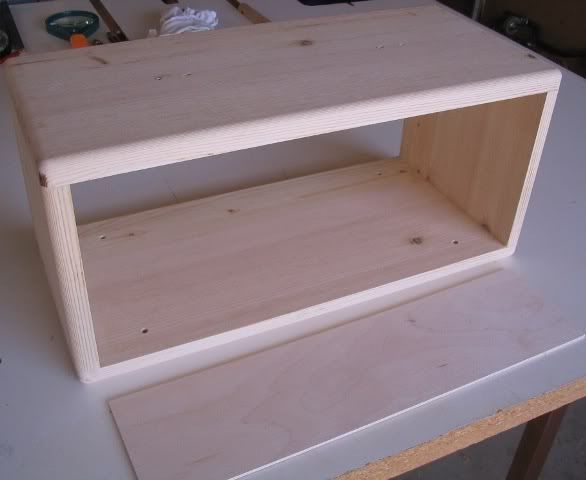
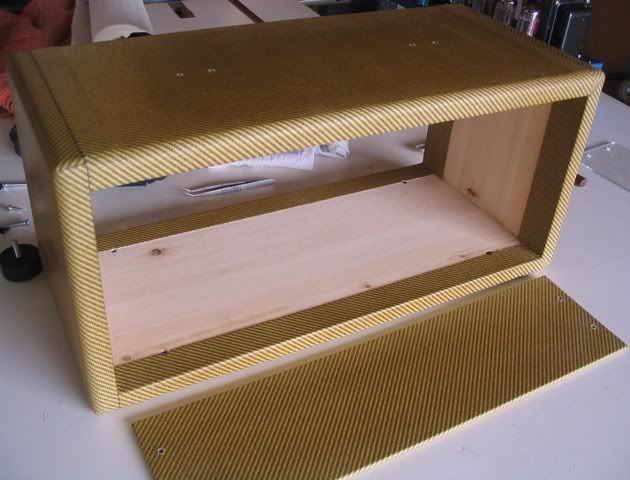
The cabinet was built with ¾” pine shelving from Home Depot. It was cut based on the inside dimensions of the original cabinet. Since the cabinet is relatively small and the amp is not too heavy, I chose to butt end the pieces together, side panels joined in between top and bottom panels, with wood glue and 1” nails (nailgun) rather than go the trouble of rabbet or box joints, With a larger cabinet and heavier amp, I would definitely consider the use of box joints for strength. I also assumed the tweed covering, glue and layers of finish would add a little to the strength, too.
Cutting the panels as perfect to square as possible really helped in making the cabinet square from the get go. A round-over router bit finished all the outside edges, then some wood putty to fill in any holes or voids and an overall sanding to prepare the wood for the tweed. I tried to remember that whatever imperfections showed up on the cabinet might show through the tweed later.
I also cut and sanded to size a 1/8” thick facia board for the front of the cabinet.
[IMG:640:438]http://img.photobucket.com/albums/v330/ ... ild012.jpg[/img]
[IMG:586:480]http://img.photobucket.com/albums/v330/ ... ild011.jpg[/img]
Tweed and Tolex
Tweed covering is not easy to find in Canada but I found some very nice quality Fender style – Brown Stripe Coated “real deal” tweed at Steamco Music in Winnipeg, Manitoba.
http://www.steamcomusic.com/catalog/tolex
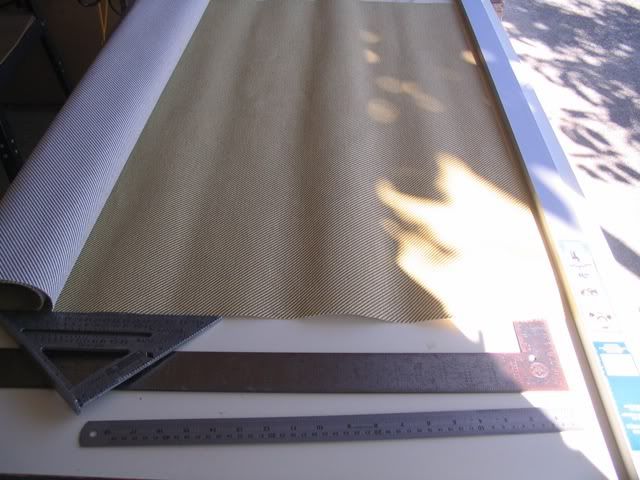
Although I have no experience with tolex, there are some subtle differences between covering a cabinet in tweed and one in tolex, primarily due to the fact that most tolex is not patterned, while tweed on the other hand has line patterns. From what I’ve read, tolex can be cut in one, two or multiple panels when covering a cabinet, but with tweed, it should be cut in four panels in order to achieve the desired line patterns.
[IMG:640:480]http://img.photobucket.com/albums/v330/ ... ild014.jpg[/img]
Cutting Tweed Panels
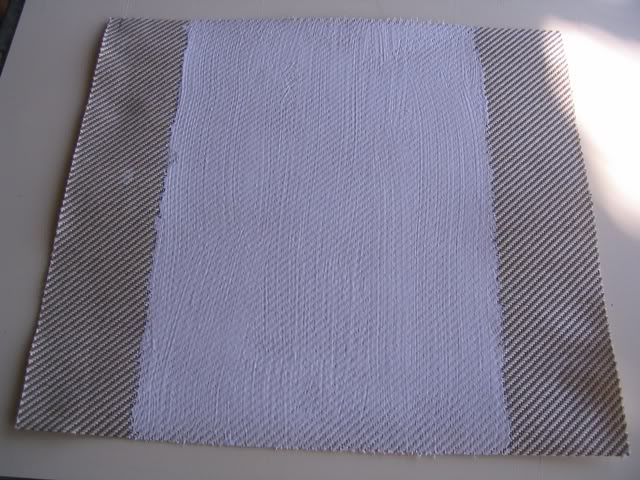
In order to achieve those patterns, the tweed panels should be cut a certain way from the bolt, and that depends on how you position the tweed for cutting. For example, if you’re looking at the bolt of cloth with the lines running from top left to bottom right, turning it 90 degrees will show the lines now running from top right to bottom left, hence this is a crucial step as to which panels are cut. Cutting the panels as square as possible,
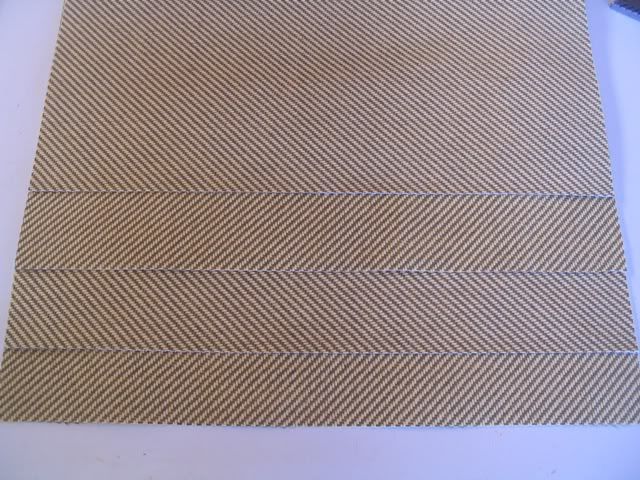
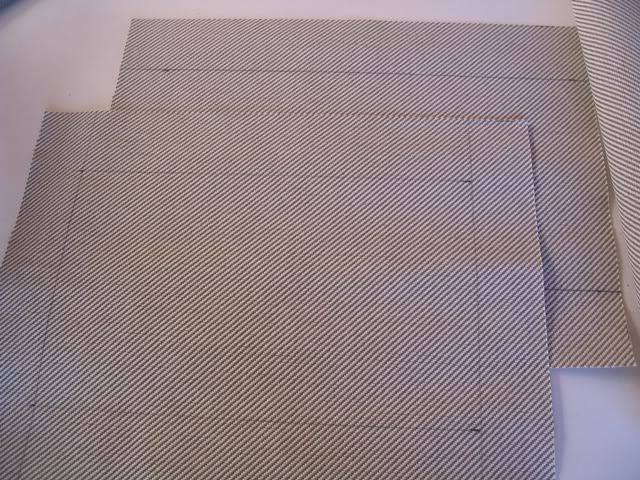
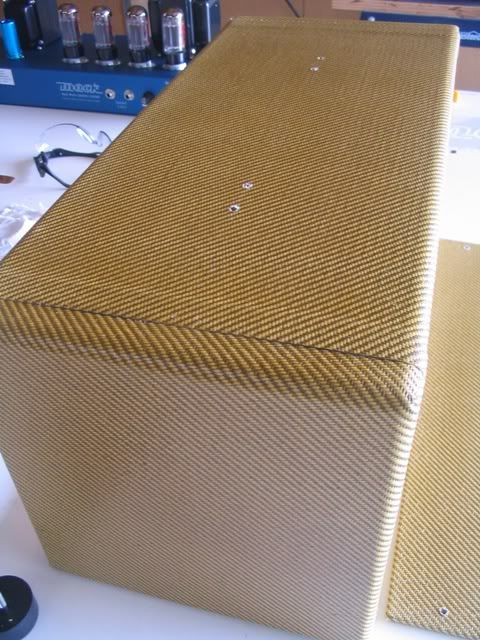
The order to cut them is top, bottom and facia board are to be cut lines running from top left to bottom right while the two side panels cut lines running from top right to bottom left. You can start in either direction but for these purposes I followed the line patterns on my existing tweed cabinets. To try something radically different, I cut the facia the same way as the side panels, as I wanted to achieve more V shaped patterns on the front as are seen on the top and bottom where the seams overlap. Normally, when looking straight on at the front of a tweed cabinet, the lines should be running in the same direction on all panels.
The picture below shows the four main pieces forming the V shapes.
[IMG:640:480]http://img.photobucket.com/albums/v330/ ... ild016.jpg[/img]
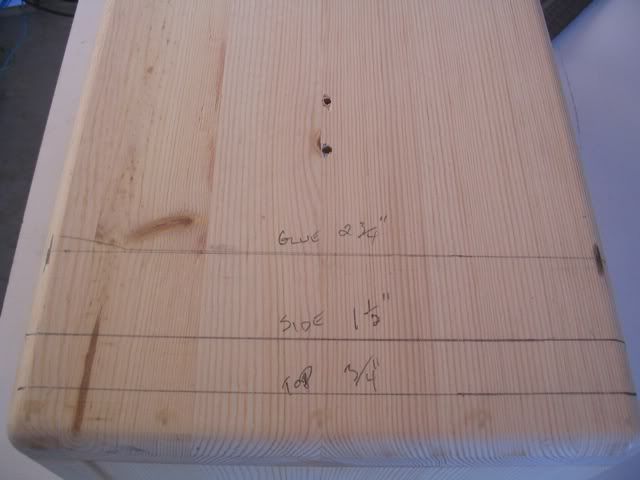
The length of each piece is fairly easy to cut. The top and bottom panels are cut to the inside length of the cabinet.
[IMG:480:509]http://img.photobucket.com/albums/v330/ ... ild015.jpg[/img]
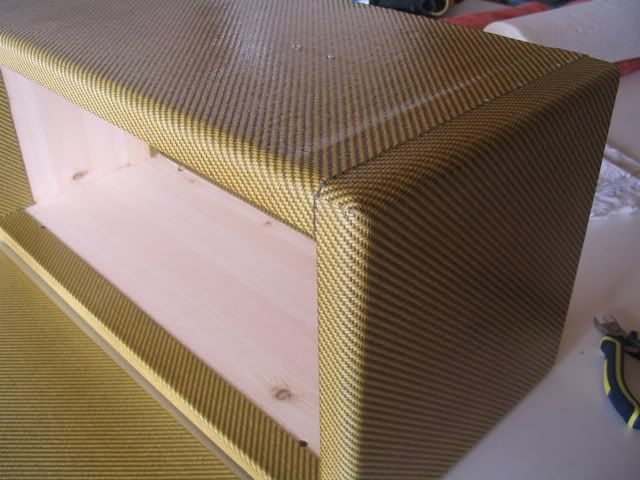
The side panels are cut by measuring from the point ‘twice the thickness of the wood from the top edge’ to the point ‘twice the thickness of the wood from the bottom edge’ This measurement should be taken with a string or sewing tape measure due to the rounded edges of the cabinet. My cabinet uses ¾” wood, so the points of measurement were between 1-1/2” (twice the wood thickness) from top and bottom edges.
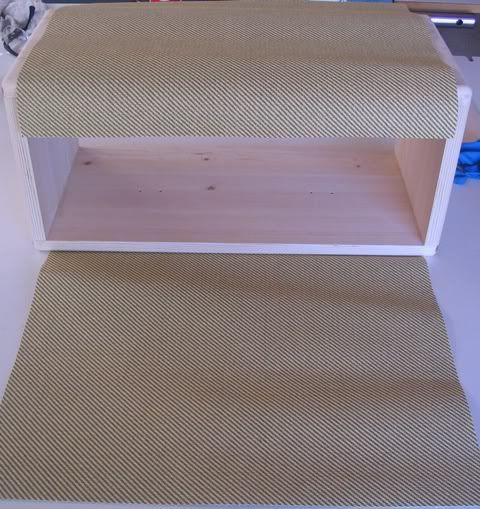
When panels are glued down the top and bottom panels should overlap the side panels the same distance as the thickness of the wood.
[IMG:640:480]http://img.photobucket.com/albums/v330/ ... ild019.jpg[/img]
Adhesives
When deciding on what adhesive I was going to use, I took into consideration the factors of dealing with tweed over tolex in that tweed would need some accuracy in lining up the panels and might need re-positioning. One of the issues with using contact cement is that it is very hard to re-position once the panel is placed on the cabinet. Another issue is how difficult it is to clean off the tweed if some contact cement gets on it by mistake. I’m not expert enough to use it for this application.
Instead, I used Weldbond general adhesive, washes up with water. It says to “use sparingly” so I tried a couple of tests by coating a piece of tweed and scrap wood, but found this to be too much glue. I then tried just a thin coating on the tweed itself and it adhered to the wood very well.
This stuff was easy to work with and easy to clean up.
http://www.weldbond.com/
Positioning and Gluing the Panels
From what I read, it appears the side panels get glued on first; this would make sense in that the top and bottom panels overlap the sides. However, after looking over my existing tweed cabinets, I noticed some attention to detail in that wherever the panels came together, the lines in the tweed matched up nicely. I couldn’t see how the side panels could line up so nicely with the top without some point of reference, so I figured that the top panel would be the reference guide to lining up the side panels. It seemed sorta logical, I could be entirely wrong, but I gave it a try anyways.
I did the gluing of the top in three stages; first was a partial area of just the top leaving all the edges free of glue, followed later by gluing down the overlapping seams of the side panels and lastly the sides that folded inside the cabinet.
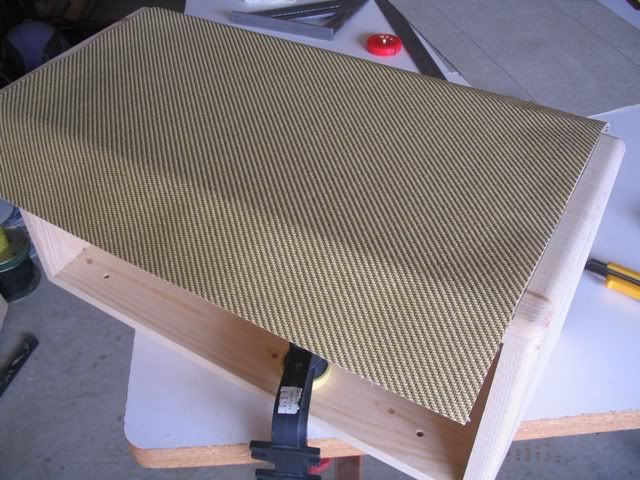
I penciled some lines on the tweed as reference points for gluing the top, since the cabinet is around 8” deep, I marked reference points on the top of the cabinet and center of the tweed panel 8” apart to help line it up while gluing.
[IMG:640:480]http://img.photobucket.com/albums/v330/ ... ild018.jpg[/img]
While another person holds the far edge of the panel away from the cabinet, take the leading edge and line it up with your reference points and then carefully but firmly press down the panel in place working towards the far edge making sure it always remains correctly positioned, pushing out any possible air bubbles or excess glue. I used a wooden dowel to roll over the tweed.
[IMG:640:480]http://img.photobucket.com/albums/v330/ ... ild021.jpg[/img]
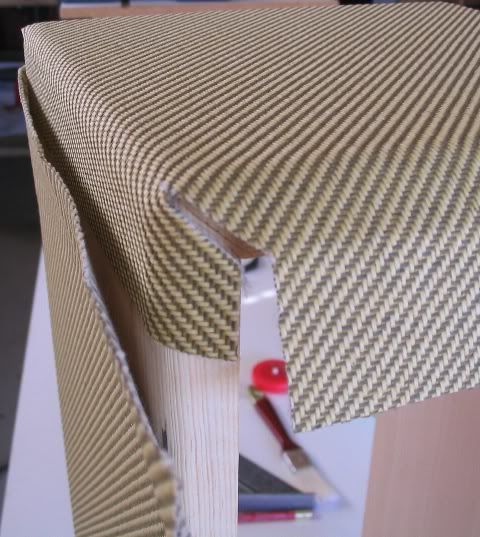
Next are the sides, gluing the panel end to end running top to bottom on the cabinet, but leaving the edges that fold up inside the cabinet free of glue for now. Again, have someone hold the far edge away from the cabinet while you’re positioning the panel.
[IMG:640:480]http://img.photobucket.com/albums/v330/ ... ild024.jpg[/img]
It is at this point you would use the top panel as reference to get the final positioning of the side panel by flipping the top seam over the side panel to see how the pattern lines up. By carefully adjusting the position of the side panel slightly and using your reference points, you can line up the pattern in the tweed such that the brown lines meet up nicely while the panel is correctly positioned overall. The same procedure was then done to the other side panel.
[IMG:640:308]http://img.photobucket.com/albums/v330/ ... ild023.jpg[/img]
Corners
There is some good information and pictures on the internet of how to do the corners when working with tolex, but those procedures can’t be used for tweed if the desired line patterns are to be achieved. I decided to do the back corners the tolex way and the front corners with another method for demonstration. Since there is already ample information on how to do tolex corners, I won’t repeat it here, but this shows how it looks after the cuts are completed.
[IMG:480:537]http://img.photobucket.com/albums/v330/ ... ild025.jpg[/img]
Here is what the tolex cut corner looks like after everything is glued. Note all the line patterns do not run together.
[IMG:323:480]http://img.photobucket.com/albums/v330/ ... ild026.jpg[/img]
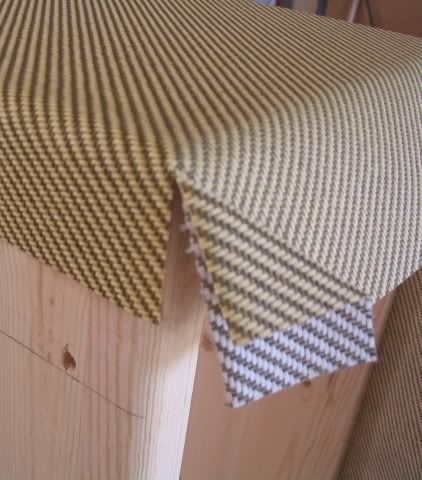
To achieve a good line pattern, place the cabinet on end with the front or back facing you.
[IMG:395:480]http://img.photobucket.com/albums/v330/ ... ild029.jpg[/img]
Fold the tweed over making sure the edges are evenly aligned.
[IMG:480:614]http://img.photobucket.com/albums/v330/ ... ild030.jpg[/img]
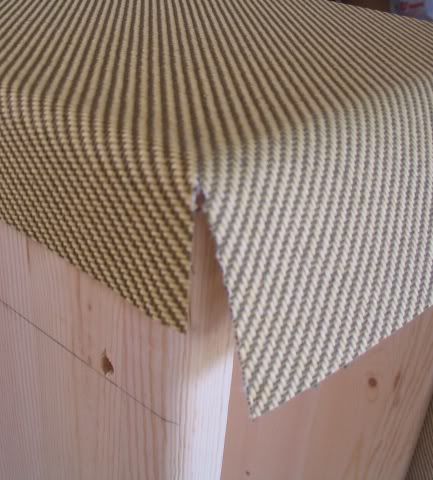
Carefully cut a straight line from the crown of the fold alongside and behind the back of the fold.
[IMG:422:480]http://img.photobucket.com/albums/v330/ ... ild031.jpg[/img]
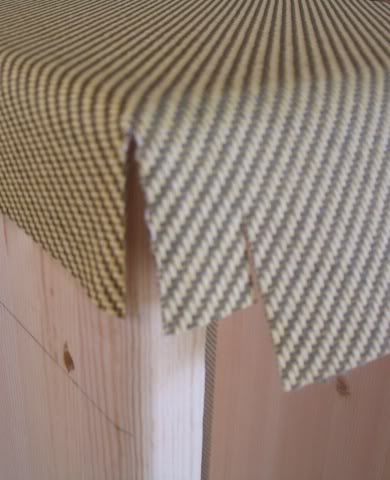
Then, remove the excess piece by using your first cut as a guide by cutting alongside it.
[IMG:433:480]http://img.photobucket.com/albums/v330/ ... ild032.jpg[/img]
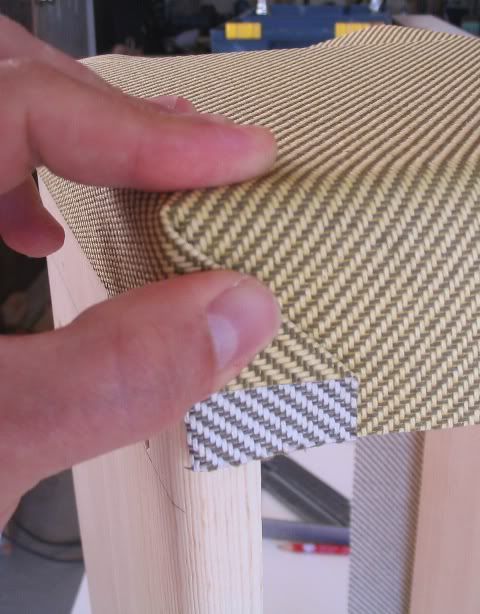
Lastly, cut a line that follows the inside of your cabinet edge and stop when it gets to the inside corner, cut off the end of the smaller piece so that it’s edge lines up with top edge of the side panel eventually looking something like this.
[IMG:390:480]http://img.photobucket.com/albums/v330/ ... ild034.jpg[/img]
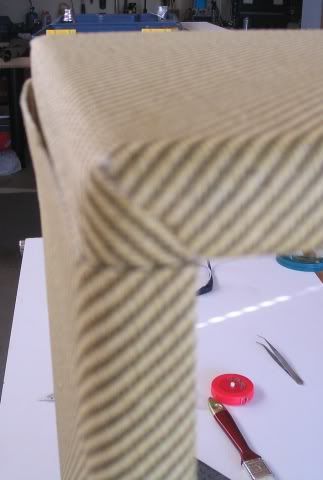
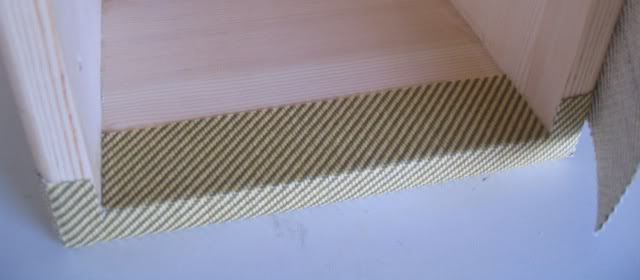
Carefully manoeuvre the two cut edges together to form a nice seam. Note that the tolex seam is at 45 degree angle of the cabinet corner while the tweed seam is not. Glue the small piece in place and fold the excess side panels around the inside of the cabinet and glue in place.
[IMG:640:280]http://img.photobucket.com/albums/v330/ ... ild036.jpg[/img]
Glue Finishing
Once all the corners are finished, the top panels’ edges can be glued overlapping the side panels. Note the painters tape in the picture, it is wrapped around the inside of the cabinet to protect the tweed of the side panel from any glue getting on it while finishing the top and bottom panels.
[IMG:640:422]http://img.photobucket.com/albums/v330/ ... ild037.jpg[/img]
The top panels’ other edges can now be folded inside the cabinet and glued. The bottom panel can be placed using the same method as the top. This should complete the gluing stage of the cabinet.
[IMG:632:396]http://img.photobucket.com/albums/v330/ ... ild040.jpg[/img]
[IMG:635:480]http://img.photobucket.com/albums/v330/ ... ild041.jpg[/img]
The facia board panel is cut, folded and glued.
[IMG:640:238]http://img.photobucket.com/albums/v330/ ... ild038.jpg[/img]
[IMG:640:229]http://img.photobucket.com/albums/v330/ ... ild039.jpg[/img]
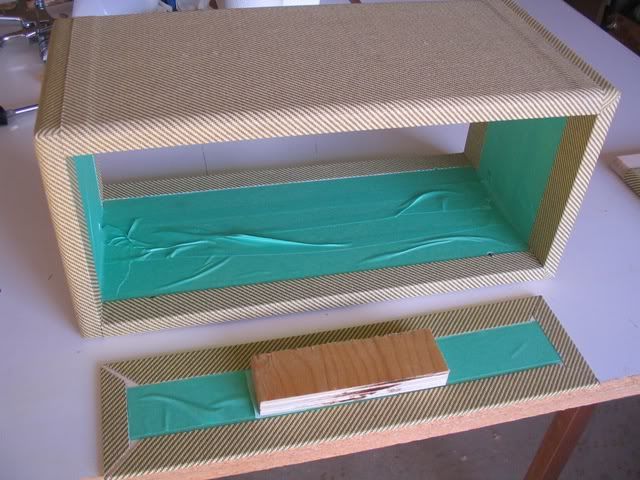
Prep Work
Tape over the wood area for spraying and handling purposes, following carefully the edges of the tweed. I taped a small block of wood for handling the facia board and using it as a stand while drying.
[IMG:640:480]http://img.photobucket.com/albums/v330/ ... ild042.jpg[/img]
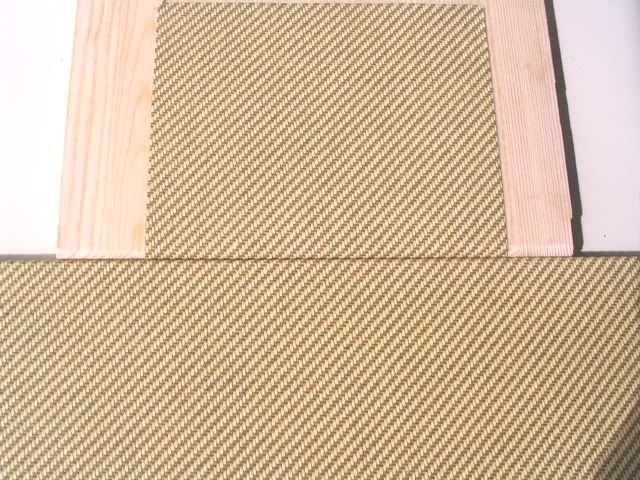
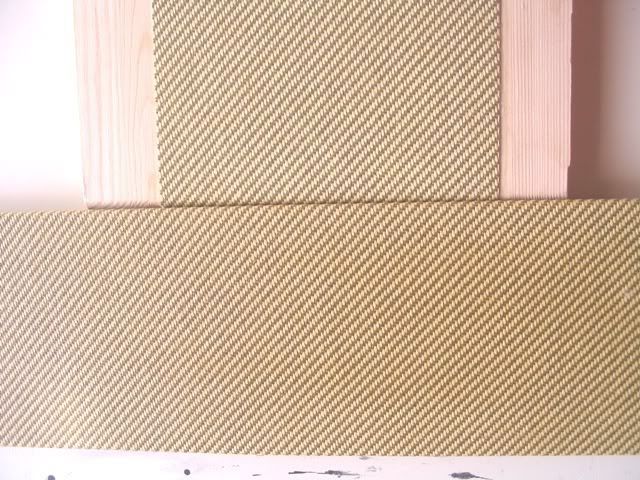
Aging, Protecting and Final Construction
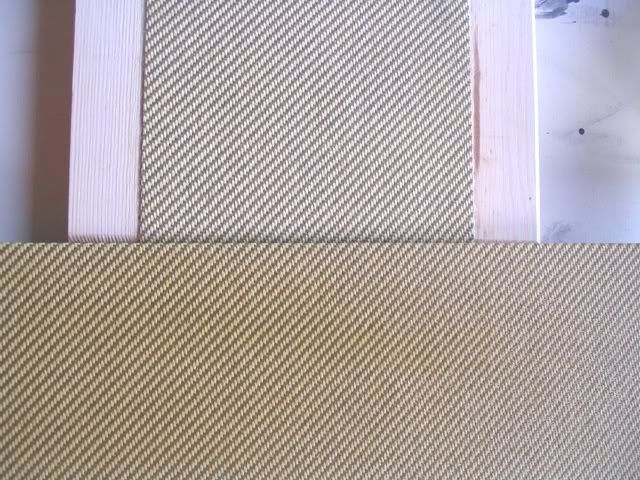
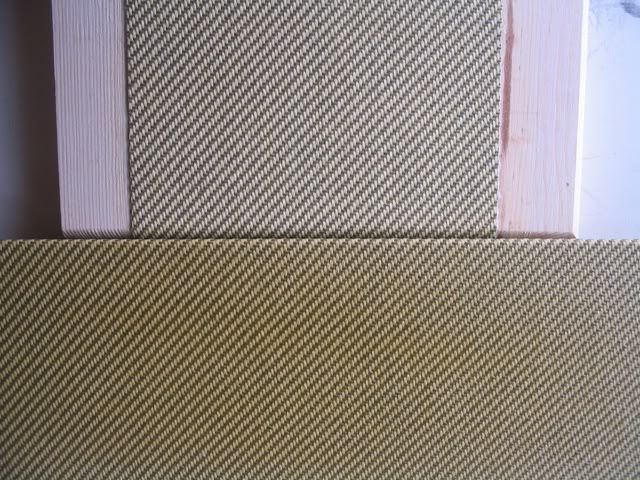
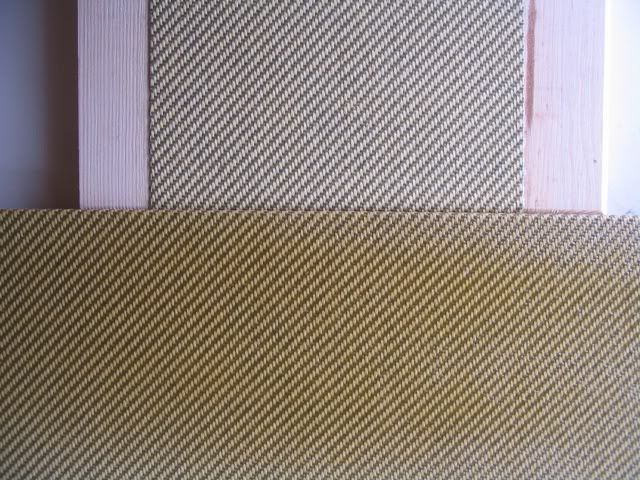
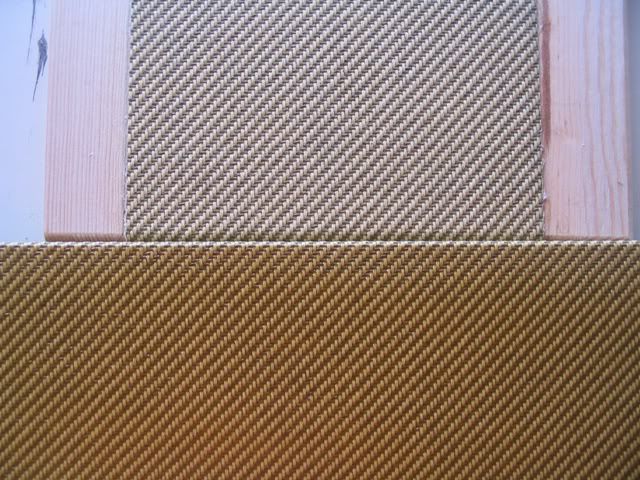
After reading up on the various methods of aging and protecting the tweed, I decided on a coat of clear oil based polyurethane satin and five coats of Minwax Honey Pine PolyShades satin, using up a 236ml can. Although, it does say on the can that spraying is not desired, I used my compressor and Binford Spray Gun for all six coats.
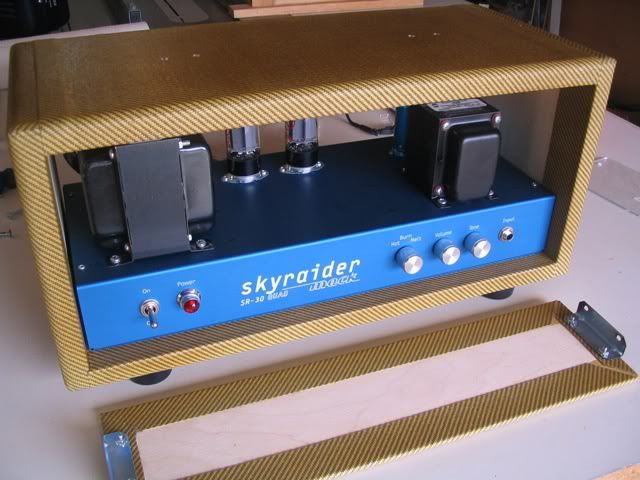
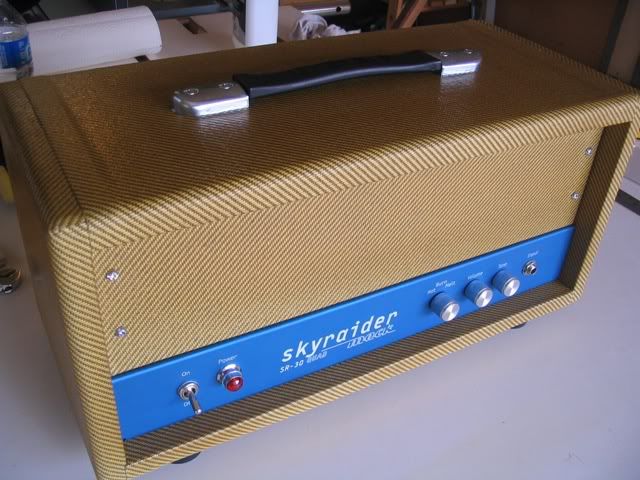
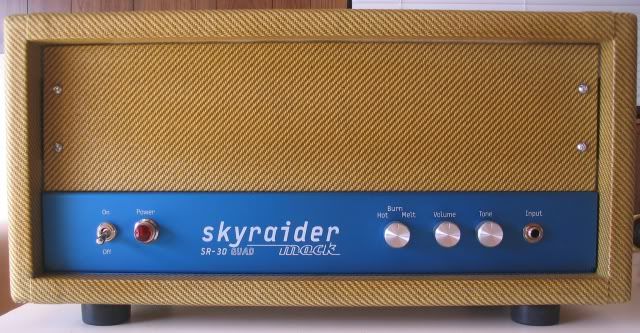
Here’s the transformation, starting with the clear coat first, followed by each coat of Honey Pine and comparing each coat to the original tweed. Each coat had a rubdown of 0000 steel wool. The rest of the pictures are of the final construction of the amp head. Enjoy.
[IMG:640:480]http://img.photobucket.com/albums/v330/ ... ild043.jpg[/img]
[IMG:640:480]http://img.photobucket.com/albums/v330/ ... ild044.jpg[/img]
[IMG:640:480]http://img.photobucket.com/albums/v330/ ... ild045.jpg[/img]
[IMG:640:480]http://img.photobucket.com/albums/v330/ ... ild047.jpg[/img]
[IMG:640:480]http://img.photobucket.com/albums/v330/ ... ild048.jpg[/img]
[IMG:640:480]http://img.photobucket.com/albums/v330/ ... ild049.jpg[/img]
[IMG:630:480]http://img.photobucket.com/albums/v330/ ... ild051.jpg[/img]
[IMG:480:640]http://img.photobucket.com/albums/v330/ ... ild052.jpg[/img]
[IMG:640:480]http://img.photobucket.com/albums/v330/ ... ild053.jpg[/img]
[IMG:640:480]http://img.photobucket.com/albums/v330/ ... ild055.jpg[/img]
[IMG:640:480]http://img.photobucket.com/albums/v330/ ... ild056.jpg[/img]
[IMG:640:480]http://img.photobucket.com/albums/v330/ ... ild057.jpg[/img]
[IMG:591:480]http://img.photobucket.com/albums/v330/ ... ild058.jpg[/img]
[IMG:640:363]http://img.photobucket.com/albums/v330/ ... ild059.jpg[/img]
[IMG:640:333]http://img.photobucket.com/albums/v330/ ... ild060.jpg[/img]
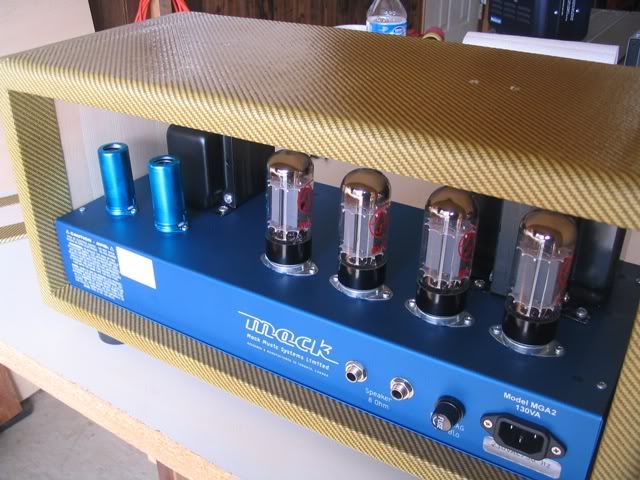
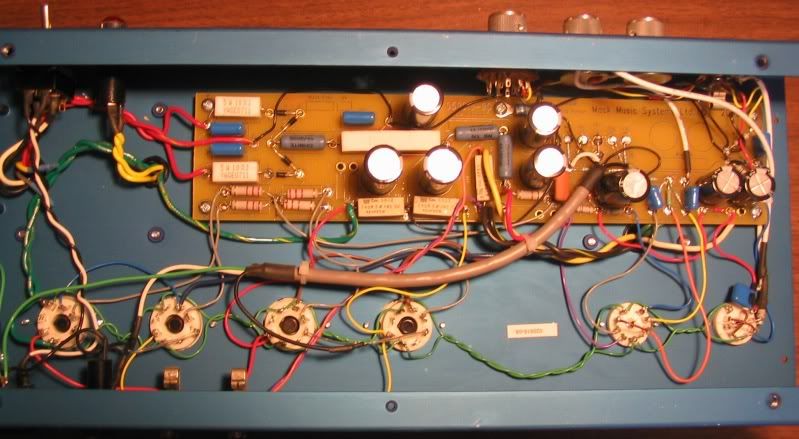
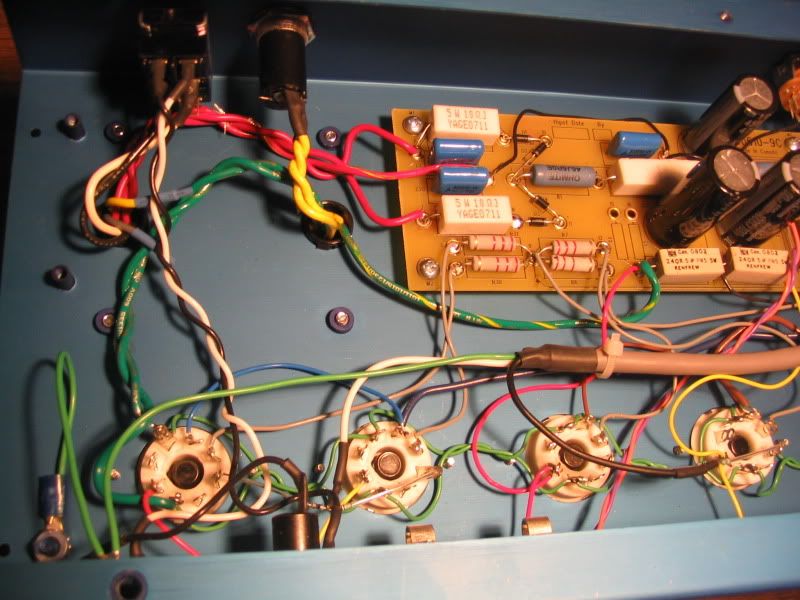
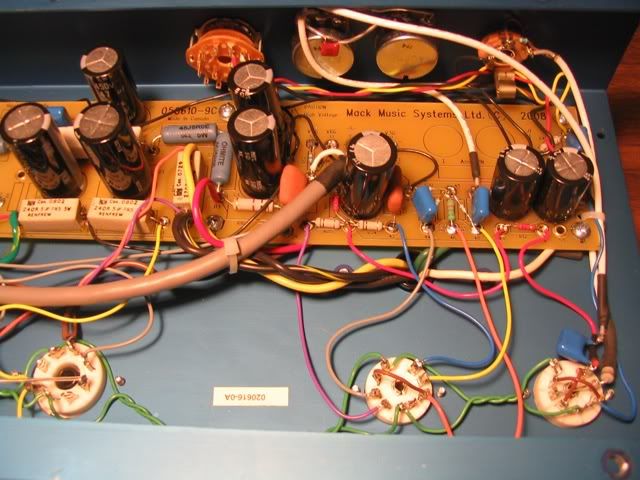
And, of course, what amp thread would be complete without a couple of “guts” shots. 
[IMG:799:439]http://img.photobucket.com/albums/v330/ ... ild003.jpg[/img]
[IMG:800:600]http://img.photobucket.com/albums/v330/ ... ild002.jpg[/img]
[IMG:640:480]http://img.photobucket.com/albums/v330/ ... ild001.jpg[/img]
Tweed Cabinet Build
Moderators: pompeiisneaks, Colossal
Re: Tweed Cabinet Build
Sweet tutorial - whew, looks like work. I was holding my breath while you cut those corners, painted the glue, and fitted the bits together. Nice. Makes me appreciate all the more the value of a tweed cabinet well done.
Gotta ask: What's the "Burn" knob about?
Gotta ask: What's the "Burn" knob about?
Re: Tweed Cabinet Build
Thanks for the kind words. Here's what the website says:Zippy wrote:Sweet tutorial - whew, looks like work. I was holding my breath while you cut those corners, painted the glue, and fitted the bits together. Nice. Makes me appreciate all the more the value of a tweed cabinet well done.
Gotta ask: What's the "Burn" knob about?
"Character Switch . The Character switch does what its name implies: changes the tonal character of the amp.
There are three settings:
1. Hot. Ultra rich and warm tube tone. Medium gain.
2. Burn. Aggressive high-mids, controlled bottom end, classic crunch and distortion tones. High gain. Great for dark sounding humbuckers.
3. Melt. Big bottom, aggressive throughout the frequency spectrum. Roaring crunch and distortion. Highest gain. Great for producing ‘huge’ distorted tone from single coil guitars."
-
dcribbs1412
- Posts: 1378
- Joined: Wed Jun 11, 2008 6:56 pm
- Location: Arizona Desert
Re: Tweed Cabinet Build
Gotta say really nice job
thanks for sharing this
Darin
thanks for sharing this
Darin

Re: Tweed Cabinet Build
Excellent tweed job 
TM
TM
-
Drumslinger
- Posts: 374
- Joined: Wed Nov 23, 2005 4:31 am
- Location: USA
Re: Tweed Cabinet Build
well done Jim!!
-
RJ Guitars

- Posts: 2662
- Joined: Tue Nov 14, 2006 3:49 am
- Location: Los Alamos, New Mexico
- Contact:
Re: Tweed Cabinet Build
Sounds like the Holy Grail of all options... how does it work?jimsz wrote:Thanks for the kind words. Here's what the website says:Zippy wrote:Sweet tutorial - whew, looks like work. I was holding my breath while you cut those corners, painted the glue, and fitted the bits together. Nice. Makes me appreciate all the more the value of a tweed cabinet well done.
Gotta ask: What's the "Burn" knob about?
"Character Switch . The Character switch does what its name implies: changes the tonal character of the amp.
There are three settings:
1. Hot. Ultra rich and warm tube tone. Medium gain.
2. Burn. Aggressive high-mids, controlled bottom end, classic crunch and distortion tones. High gain. Great for dark sounding humbuckers.
3. Melt. Big bottom, aggressive throughout the frequency spectrum. Roaring crunch and distortion. Highest gain. Great for producing ‘huge’ distorted tone from single coil guitars."
rj
Good, Fast, or Cheap -- Pick two...
http://www.rjguitars.net
http://www.rjaudioresearch.com/
http://diyguitaramps.prophpbb.com/
http://www.rjguitars.net
http://www.rjaudioresearch.com/
http://diyguitaramps.prophpbb.com/
Re: Tweed Cabinet Build
I find my LP sounds great on Burn while my Strat sounds great on Melt. I'll use the Hot setting when I want some clean headroom for pedals.RJ Guitars wrote:Sounds like the Holy Grail of all options... how does it work?jimsz wrote:Thanks for the kind words. Here's what the website says:Zippy wrote:Sweet tutorial - whew, looks like work. I was holding my breath while you cut those corners, painted the glue, and fitted the bits together. Nice. Makes me appreciate all the more the value of a tweed cabinet well done.
Gotta ask: What's the "Burn" knob about?
"Character Switch . The Character switch does what its name implies: changes the tonal character of the amp.
There are three settings:
1. Hot. Ultra rich and warm tube tone. Medium gain.
2. Burn. Aggressive high-mids, controlled bottom end, classic crunch and distortion tones. High gain. Great for dark sounding humbuckers.
3. Melt. Big bottom, aggressive throughout the frequency spectrum. Roaring crunch and distortion. Highest gain. Great for producing ‘huge’ distorted tone from single coil guitars."
rj
Last edited by jimsz on Sat Sep 17, 2011 1:06 am, edited 1 time in total.

Re: Tweed Cabinet Build
Big thanks, I've been staying away from tweed from fear of mucking it up. I'm saving your images. I've been using pegs for lack of a way of doing box joints. They are hardwood pegs I found at Ace Hardware, 5/16" work well. I glue it and fix it all up tight with sheetrock screws. After the glue sets up I remove the screws and drill for the pegs. I have no way to test the strength, probably not as good as box joints but still pretty good I would think. I don't like nails or screws anywhere near my router bits. If you wanna do grill cloth canvas pliers have been a revelation. I used to detest doing grill cloth now I barely loathe it, and I get it drum tight. Here's a fine tutorial:
http://jam4jmessageboard.websitetoolbox ... on-2403012
and some others:
http://jam4jmessageboard.websitetoolbox ... rum=104865
edit: BTW some shellac over the knots if using #2 pine will prevent them from eventually bleeding through light colored tolex.
http://jam4jmessageboard.websitetoolbox ... on-2403012
and some others:
http://jam4jmessageboard.websitetoolbox ... rum=104865
edit: BTW some shellac over the knots if using #2 pine will prevent them from eventually bleeding through light colored tolex.
You do not have the required permissions to view the files attached to this post.
Re: Tweed Cabinet Build
Those dowel pegs look to be the ticket for us wood working challenged folks.
I have used regular dowels before but those may be better because of the texture.
I remember years ago my uncle made some home made Hi Fi speakers for his living room.
He was installing some grill cloth one day when I was there and I remember him having one end stapled to the frame and on the other end of the cloth he had a couple 1x2 or so boards screwed together with the grill cloth sandwiched between them.
He was able to pull that over the opposite side of the grill frame and get it real tight and straight then staple it.
It was years ago so I might be wrong but I believe that is what he did.
That is always the challenge with a patterned grill cloth, keeping it straight and aligned on the outside edges.
Tom
Don't let that smoke out!
Don't let that smoke out!


Re: Tweed Cabinet Build
Beautiful tutorial. Thank you! +100 EP!
-
Todd Hepler

- Posts: 24
- Joined: Mon Jan 17, 2005 10:16 pm
- Location: Euharlee, GA
Re: Tweed Cabinet Build
I am also challenged by boxjoints/fingerjoints/dovetails and like others here I chose a solution that was inexpensive, strong, and easy:
Biscuits!
Too many years of watching Norm Abrahms slamming drahws together with his biscuit joinah, I guess.
I got a Ryobi unit that was inexpensive. The biscuits are a cheap and reasonably accurate way to assemble a butt joint. The best part is that they make it nearly impossible to hose a joint.
I have around 5 cabs out there that I built using this technique - with no issues - a couple of these are approaching the 7-8 year mark.
BTW - OP: nice tut on tweed !
Todd

Re: Tweed Cabinet Build
I guessing that the rotary switch is swapping the grounds of cathode bias resistor/bypass cap for each setting.RJ Guitars wrote:Sounds like the Holy Grail of all options... how does it work?jimsz wrote:Thanks for the kind words. Here's what the website says:Zippy wrote:Gotta ask: What's the "Burn" knob about?
"Character Switch . The Character switch does what its name implies: changes the tonal character of the amp.
There are three settings:
1. Hot. Ultra rich and warm tube tone. Medium gain.
2. Burn. Aggressive high-mids, controlled bottom end, classic crunch and distortion tones. High gain. Great for dark sounding humbuckers.
3. Melt. Big bottom, aggressive throughout the frequency spectrum. Roaring crunch and distortion. Highest gain. Great for producing ‘huge’ distorted tone from single coil guitars."
rj
Values: Maybe classic Fender (1k5/25mF), classic Marshall (820/0.68mF), and unbypassed???